Over the last couple of years, I've been using the bounce card in one manner or another and after looking at some designs on the internet, decided to make my own. After all, I found it quite ridiculous to pay $50, $100 or more for a piece of glorified plastic tupperware that really did not do all that much in the end... except eat the little light a speedlight already had as well as chew up precious battery power by making your flash work harder, as well as spray light in places where my camera would never see it... like behind me.
So I spent about $10 for some foam core sheets and started off small for the first project. This one would cost you about 25 cents to make and took all of maybe 5 minutes to make.
This was what I call V.0.1 beta:
It worked about as well as the bounce card that was integrated into some flashes, and I saw that this material was perfect for this application. It was super light, very cheap and practically unbreakable, so that was cool... but bigger is better, right? On to V.1.0!
Version 1.0 was not much larger, but now had a black backing to prevent the small amount of back-spill and was a little rounder. It was also big enough that when placed side to side, worked a little better than the initial beta and was just the right size to use for on camera flash too. This one costs about 50 cents and took me all of 10 minutes to make.
This is V.1.0:
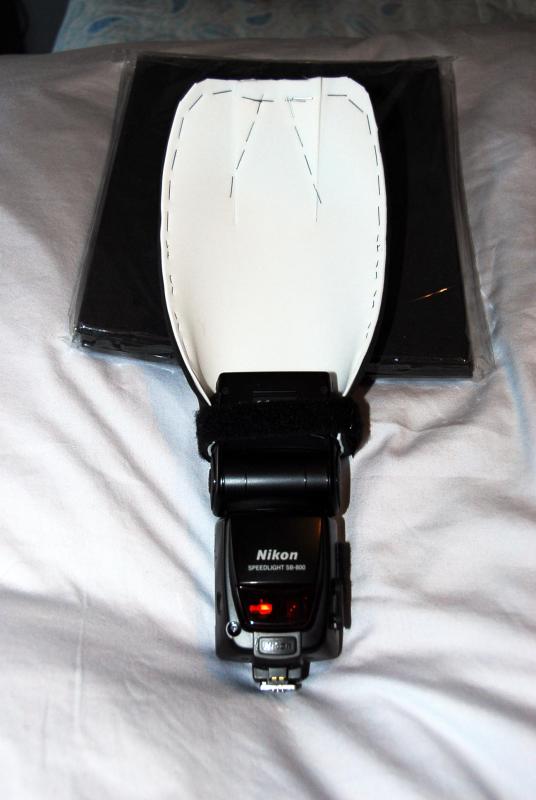
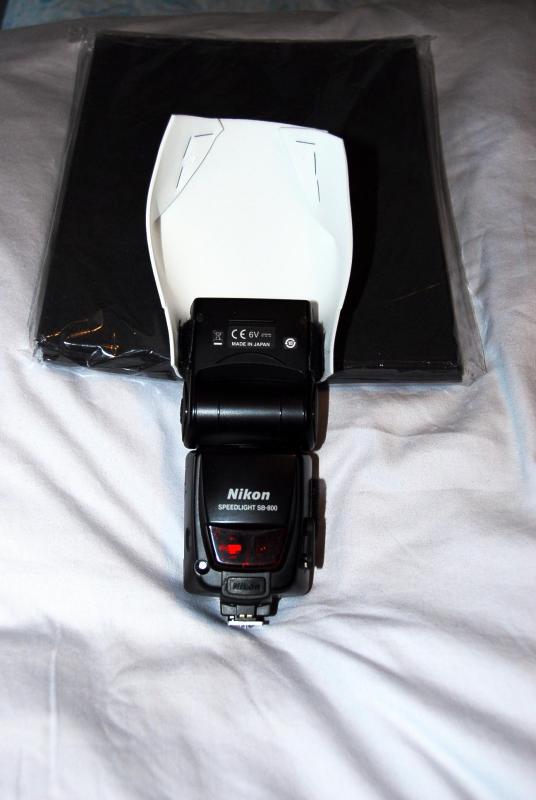
Again, even though V.1.0 was a little bigger, I felt I was not maximizing the full 8.5 X 11 inch page of foam core, and that is where V.2.0 was born. Still 2 sided (black on the back side), 2 layers, VERY light and again, placed side by side against the V.1.0 gave me a better quality of light. Time to create this one was not much more than V.1.0, maybe 15 minutes each and cost rose to about $5 because of the velcro. Today this is the one that is always on my camera whenever I use on camera flash, and the improvement over straight flash that is on camera and blasting you is very obvious. I saw tremendous improvements in the quality of the light . When space is very limited, and I need to get the shot... THIS is the tool to I reach for first and must have!
This is V.2.0:
I used V.2.0 pretty much everywhere, even on light stands in off camera flash situations, and realized that here, was even more potential for improvement.
I needed something bigger yet again, so V.3.0 was born. This version had to be not only bigger, but stronger and stiffer. I looked around for larger pieces of foam core, but could not find any, so I took two sheets of foam core, used gaffer's tape and joined them together to make one larger bounce card and V.3.0 was about to be born. I realized that I needed a stronger base and something to stiffen it up, so for the base, I used a combination of 2 inch gaffer's tape along with a plastic mesh used in sewing applications that anyone can pick up at near any Walmart in the hobby and crafts section. I also thought up a way to reduce upwards bounce and focus a little more light forward, by inserting small slits in the design, and this let me bend the top of the card forward a lot more... and by using velcro, I also had the choice of leaving the bounce card "open" where light would bounce upwards and give me some beautiful fill, or the choice to close things down a little and focus the light forward and minimize any upward bounce.
This card served me for over two years and many hundreds of events. With this size and weight, it is now a little too big and heavy for on camera flash use, but it was PERFECT for use if you placed a flash on a light stand. This one became my standard that I carried everywhere.
This is V.3.0:
(in open upward "bounce" configuration)
(in the more closed configuration)

Not to be outdone, I had to make one more final version... V.4.0... the version that was bigger, the most functional, the strongest, the one that gave me the BEST results and still was light enough to be attached to a flash. I had previously looked around for sources of bigger sheets of black and white foam core, but was unsuccessful. On the internet, someone mentioned that Walmart had these large foam core sheets around 12 X 18 inches... perfect! I rushed over to the local Walmart and... nothing, they never even heard of it, so the project just fell to the back of my mind and I continued to use V.3.0 happily.
About a year later, the Walmart store closed and was moved to a new mall a lot closer to my home, and so we went with the family to check it out. Nothing much interesting until I hit the hobby and crafts section... and there it was... a collection of 12 foam core sheets in 11.8 X 17.7 inch size, and not just that but that plastic mesh was in the same section, and they had a bigger too! The package of Elmer's Foam Sheets was $10 and had, amongst other colours, two black and two white sheets... perfect for my needs. The plastic mesh was an affordable $1.50 each and I bought two, since I now had the materials needed to create two of the biggest bounce cards that I would ever need.
Here now starts the part of the blog which I am sure many people come here for.. to see how I made my biggest bounce card yet.
How to make the BIGGEST BOUNCE CARD you'll ever need!
Note: Click on any photo to see it larger... hit ESC (escape) to return to the blog.
This is how I make my bounce cards...
I start off with a general design. The form that I initially decided on was like this, using one of the green sheets of 11.8 X 17.7 inch foam core:

You may see that I later made a small change in the bottom part of the bounce card's design. This design served two purposes:
- it increased the overall strength of the design and removed a potential weak area.
- it curved the bounce card more, increasing it's diffusional effectiveness.
The plastic mesh that I bought was also more than big enough to serve as the inner support structure of my best bounce card to date. The mesh was very light and strong and the perfect part for this design.

Here is a close-up of the plastic mesh:

Once I had the design the way I wanted with the green foam core, I transferred the design to the black and white ones, and cut them out to match, taking the time to make two bounce cards, if I so wished.

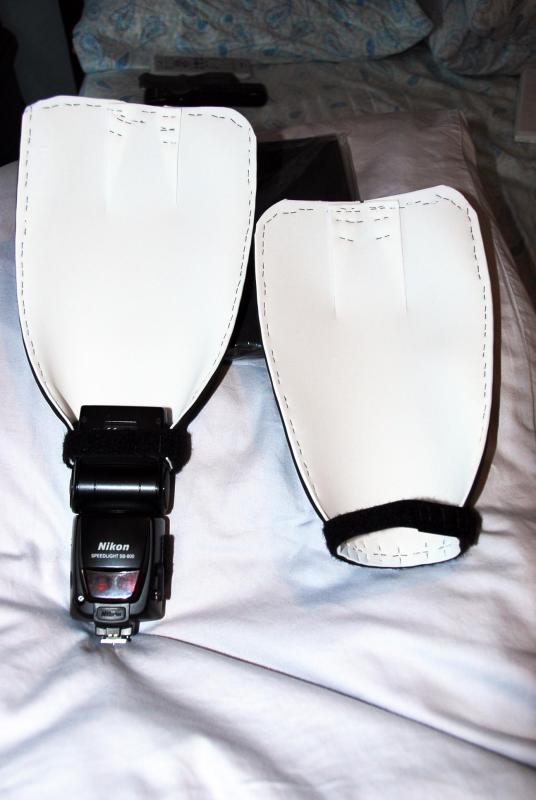
Here you can see the size increase, as I layed down the V.3.0 card on top of the cut out pieces of the V.4.0 foam core:

Next, I cut out the same shapes in the plastic mesh material:

The next step, I could have done in the first place, but I was more comfortable doing it in 2 steps. The next step was where I cut down the plastic mesh further, so that it was smaller than the foam core pieces. This is important for a couple of reasons;
- the completed bounce card bends easier
- it lasts longer by not rubbing anywhere inside

The next step is one of the reasons my design of the bounce card works so well and offers me the choice of bouncing light off the ceiling (done sometimes when the ceiling is white and low/available)... and that is to insert the slits that will permit me to bend and fold over the top of my bounce card:

The next part of the project is not difficult at all, but it is the longest part to complete... and it is also very important for durability and longevity. This is where we add gaffer's tape to all the edges of both the black and white pieces of foam core. This step alone took me about an hour to do while watching a little TV at the same time (about 15 minutes each side, and I covered 2 big bounce cards). Make sure that you tape both sides of both halves (black and white).


With the biggest part of the job now done, the rest goes a little quicker and you are about 5-10 minutes away from completing the card. The next part involves opening up the slits that permit the top of the card to open on the plastic mesh section. Make the openings bigger so that again, there is no rubbing or pressing. If you make them the same size, your card will distort and not sit properly. It doesn't matter if the cuts aren't 100% perfect, no one will ever see this part of the card.

Because the plastic mesh is smaller than the 2 halves, it is important that we take some way to keep it from moving around inside. Gaffer's tape to the rescue again. A couple of small strips of tape here and there make sure the plastic mesh never moves.

Now comes the time that we bind the two halves together. Some people used glue, some people used tape... I used staples. For me, this seems to work very well.

Next I took a piece of two inch wide gaffer's tape and sealed the opening along the bottom.

Now the base is stronger... and ready for the two inch wide strip of industrial velcro (loop side).

Next was 2 strips of the hook side of the velcro.

Next, industrial velcro is placed on both the inside and outside of the bounce card. Please note the proper placement of where the velcro is placed... on the back side it is placed at the BOTTOM of the slits. On the white side, it is placed at the TOP of the slits.


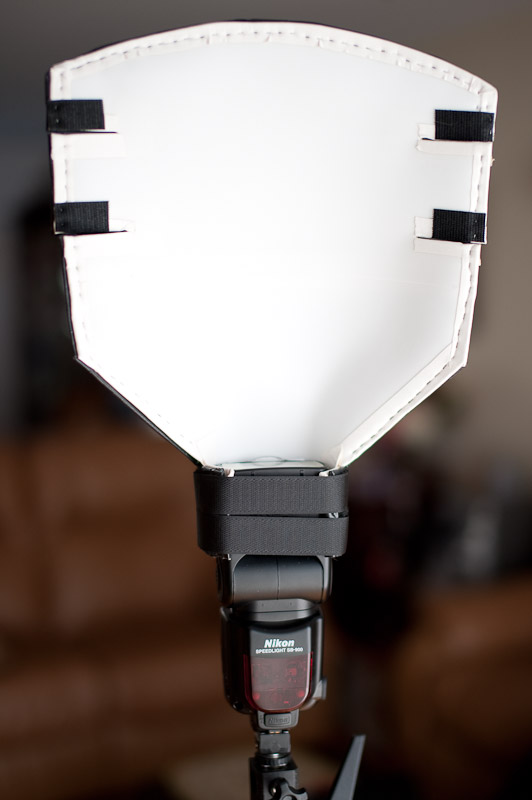
That's it... you are all done and ready to use your new bounce card! So how does it look? Well, it looks just like this!
Here it is in the full open position. This permits full upward light as well as forward.


Here it is with the top lip "closed". In this position a small amount of light is blocked (about 40%)


Here it is with the two sections "closed". In this position more amount of light is blocked (about 80% of upward cast light is blocked)


In the future, I will be adding a small bill (like a baseball cap has) to it,that one can add or remove, thanks to velcro, and that will permit me to close off near 100% of the upward light, giving me a lot of control.
So... how well does it work, is this thing any good?
Actually, it is AWESOME at how well it does it's job. We use light modifiers to soften and diffuse the light and the more learned and/or knowledgeable photographers will know that it is the apparent size of the light that makes it soft. The bigger the light source, the softer.
A bare speedlight that is like 1 X 3 inches in size, is the harshest source of light that I know, so using this tool dramatically changes the size and the results. Let me give you two examples... first is in how the light is spread out more versus a bare speedlight.
In the following four photos below, the location and distance of the SB-900 speedlight that I used, is always unchanged. It is sitting in a plastic support on the dining room table 8-9 feet from a small wall. The only differences in the next two photos is that in the first photo it is just a bare bulb and in the second it is with the bounce card installed.
Here you can see what pattern the bare speedlight throws against the wall from about 8-9 feet away, note how uneven the pattern is from bottom to top.

Here now is the same speedlight at the same distance, but with the bounce card installed. The light reaches all the way to the ceiling evenly... and this is with the bounce card in the "closed" position.

Many people may say "cool, it spreads the light more, but it does nothing to truly diffuse or soften the light", and here they would be very mistaken.
Let's take a zoomed in look of the above two photos and focus our attention to the shadows on the wall caused by the light passing by the floral basket. In the first one, we can tell that the shadows are hard and well defined. Definitely a product of straight flash!

Now, let's look at that same shadow, but with the bounce card installed. Yes, of course it is still there, but look at how diffused the edges are, how much less prominent the shadow is. Where above that shadow is near black, this one is clearly lighter grey, and the area of diffused to dark is clearly a much larger transitional distance. This shadow is clearly much softer. Oh, that black mass in the bottom right of the photo below, that is the actual bounce card that crept into the shot.

Ok, let's be clear about something... this modifier is nowhere near as soft as a softbox, or even an umbrella, but it is better than a straight flash by leaps and bounds and it is the perfect tool in tight locations or when high mobility is a factor.
I cannot imagine myself walking around at a wedding reception with an umbrella or a soft box taking shots from table to table... yet a small light stand, a single flash and this modifier are the most effective tools in this environment... and I have used it as such for years now. It takes a brutally harsh light and makes it into not a soft light, but a crisp light... a light with edges that are not so harsh, shadows that are not as cuttingly sharp as they would be without it... and this is why it is one of my favorite... and CHEAPEST light modifiers.
Enjoy!